When it comes to finding budget-friendly home upgrades, it’s easy to envision a hefty price tag and think spending less money is an impossible task. However, transforming your living space doesn’t always require a deep dive into your savings.
In this article, we’ll delve into six budget-friendly home improvement ideas that not only enhance your home’s aesthetics but also leave your wallet happily intact. Get ready to discover DIY projects and cost-saving strategies that breathe new life into your living space without breaking the bank.
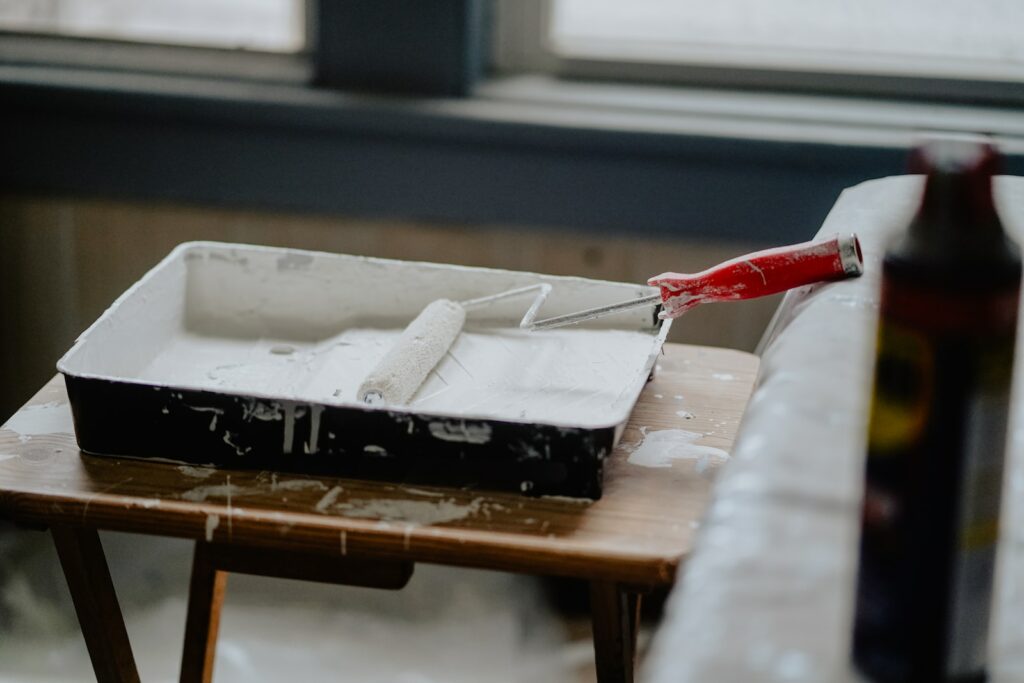
Paint: The Power of a Fresh Coat
When it comes to budget-friendly home upgrades, few options pack as much punch as a fresh coat of paint. The transformative power of paint is nothing short of astonishing. Whether you’re revamping your entire home’s interior or giving a single room a makeover, this simple yet effective strategy can breathe new life into your living space. It’s like waving a magic wand that ushers in a sense of freshness and renewal.
A Canvas of Possibilities
Think of your home’s walls as a canvas awaiting your creative touch. The choice of paint color can set the tone for the entire room. For budget-conscious upgrades, consider opting for light and neutral colors. These shades have a remarkable ability to create a sense of openness and airiness, making your space feel larger and more inviting.
Imagine walking into a room bathed in soft, neutral hues—it’s like stepping into a tranquil oasis where serenity and calmness prevail. Light colors reflect natural light, amplifying its presence and brightening up your living spaces.
DIY-Friendly and Personal
One of the most appealing aspects of a paint project is that it’s eminently DIY-friendly. You don’t need to be a professional painter to achieve stunning results. With a bit of preparation, the right tools, and some patience, you can put your personal touch on your home without hiring expensive contractors.
Painting is a creative endeavor that allows you to express your style and personality. Whether you opt for a classic white or experiment with soft pastels, your choices can reflect your unique taste and preferences. It’s like donning an outfit that perfectly suits your personality—your home becomes an extension of yourself.
Preparation is Key
Before you embark on your paint project, it’s essential to prepare properly. Here’s a brief checklist to ensure a successful painting experience:
- Gather Supplies: Invest in quality paintbrushes, rollers, painter’s tape, drop cloths, and paint trays. Having the right tools makes the job easier and produces better results.
- Surface Preparation: Clean and prepare your walls by removing any dust, dirt, or imperfections. Patch any holes or cracks with spackle and sand them smooth.
- Primer: Depending on the condition of your walls and the chosen paint color, you may need a primer. Primer helps paint adhere better and ensures a uniform finish.
- Paint Selection: Choose the right type of paint for your project, considering factors like the room’s use and the finish you desire (e.g., matte, satin, or semi-gloss).
- Protect Surfaces: Cover floors, furniture, and fixtures with drop cloths or plastic sheeting to prevent accidental paint splatters.
- Technique: Practice your painting technique, starting with edges and corners before moving on to larger areas.
- Multiple Coats: Depending on the paint color and surface, you may need multiple coats for an even finish. Be patient and allow each coat to dry before applying the next.
Thrifty Thrills: Secondhand Gems
In the world of home improvement, where budgets can often feel like limitations, there exists a treasure trove of untapped potential: secondhand gems. It’s a concept as old as time itself—what one person may discard as obsolete, another sees as an opportunity for transformation. In this section, we’ll embark on a journey of thriftiness and creativity, exploring the wonders of secondhand furniture and decor. Think of it as a scavenger hunt for hidden treasures that not only fit your budget but also infuse your living space with character and charm.
The Thrill of Discovery
Imagine strolling through the aisles of a thrift store, visiting garage sales, or scrolling through online marketplaces—you’re not just shopping; you’re on a treasure hunt. Every piece you encounter has a story, a history, and the potential for a new chapter in your home.
The thrill of discovering a diamond in the rough is unmatched. That old wooden chair with peeling paint? With a fresh coat of paint and some new upholstery, it can become a charming addition to your dining room. The dusty mirror with an ornate frame? A bit of cleaning and a new coat of gold or silver paint can turn it into an elegant focal point in your hallway.
The Power of Creativity and DIY Magic
When you embrace the world of secondhand furniture and decor, you’re not just a shopper; you’re an artist. It’s a canvas of possibilities waiting for your creative touch. What may seem outdated or worn can become a unique and personalized piece in your home.
Take that vintage dresser with dented drawers, for example. With some sanding, a fresh coat of paint, and new knobs, it can be reborn as a chic and functional statement piece in your bedroom. It’s like taking a forgotten antique and turning it into a modern masterpiece.
Cost-Saving Brilliance
The financial benefits of secondhand shopping are undeniable. Thrifted furniture and decor are often a fraction of the cost of their brand-new counterparts. This cost-saving brilliance not only allows you to stay within your budget but also opens doors to creative projects you might not have considered otherwise.
Consider the savings when furnishing an entire room with secondhand finds. You can allocate your budget to high-impact pieces while filling in the gaps with thrifty treasures. It’s like putting together a puzzle, where each piece contributes to the overall beauty of the picture.
Environmental Consciousness
Beyond the budget-friendly aspect, opting for secondhand furniture and decor aligns with an environmentally conscious lifestyle. It’s a choice that reduces waste and extends the lifespan of items that might have otherwise ended up in landfills. By giving these pieces a second chance, you’re contributing to a more sustainable future.
Tips for Successful Secondhand Shopping
- Know What You Need: Have a clear idea of what you’re looking for to avoid impulsive purchases.
- Inspect Carefully: Examine items for damage or wear and consider whether it’s something you can repair or improve.
- Get Creative: Don’t be afraid to envision how an item can be transformed with a little creativity and DIY effort.
- Negotiate: When buying from garage sales or online marketplaces, don’t hesitate to negotiate prices.
- Enjoy the Process: Secondhand shopping is an adventure. Embrace the journey, and relish the stories behind your newfound treasures.
Illuminate with LEDs: Energy-Efficient Lighting
In the realm of home upgrades, few changes have as profound an impact as the lighting. It’s not just about brightening up your living spaces; it’s about creating the right ambiance, saving on energy bills, and being environmentally responsible. In this section, we’ll explore the world of LED lighting—a budget-friendly and eco-conscious choice that can truly transform your home’s atmosphere. Think of it as an illumination revolution that not only benefits your wallet but also elevates your home’s aesthetics.
The Brilliance of LEDs
Light Emitting Diodes, or LEDs, have taken the lighting industry by storm, and for good reason. These small but mighty bulbs offer a host of benefits that make them a top choice for savvy homeowners.
- Energy Efficiency: LED bulbs are incredibly energy-efficient, consuming significantly less electricity than traditional incandescent bulbs. This means you can keep your home well-lit while slashing your energy bills.
- Longevity: LEDs are built to last. With an average lifespan of around 25,000 to 50,000 hours, you won’t need to change bulbs as frequently, reducing maintenance costs.
- Variety of Tones: LED bulbs come in various color temperatures, ranging from warm to cool tones. This versatility allows you to create different moods in different rooms. Picture warm, cozy lighting in your living room for a relaxing evening and cool, crisp lighting in your home office for focused work—it’s like having a lighting orchestra at your fingertips.
Budget-Friendly Brilliance
When you upgrade to LED lighting, you’re essentially giving your home a lighting makeover without breaking the bank. The energy savings alone can be substantial, especially if you replace multiple bulbs throughout your home. It’s like giving your home’s lighting system a much-needed efficiency boost.
Moreover, LED bulbs may have a slightly higher upfront cost than traditional incandescents, but their long lifespan more than compensates for it. You’ll spend less on replacements and enjoy uninterrupted, energy-efficient lighting for years to come.
Environmental Responsibility
Opting for LED lighting is not only a smart financial move but also an environmentally responsible one. LED bulbs produce significantly less heat than incandescent bulbs, which means less energy is wasted. Additionally, they contain no hazardous materials like mercury, making them safer for disposal and reducing environmental impact.
Installation Ease
Switching to LED lighting is a hassle-free process. LED bulbs are designed to fit into standard fixtures, so you won’t need to make any modifications. It’s like upgrading your smartphone—simple, quick, and with immediate benefits.
Choosing the Right LED
When shopping for LED bulbs, consider the following:
- Brightness: Determine the lumens you need for each room to achieve the desired level of illumination.
- Color Temperature: Select bulbs with the right color temperature (measured in Kelvins) to match the room’s purpose and ambiance.
- Dimmability: If you use dimmer switches, ensure the LED bulbs are compatible.
DIY Backsplash: Kitchen Elegance on a Budget
Your kitchen is more than just a place to prepare meals; it’s the heart of your home, where family and friends gather to share stories and create memories. But enhancing its functionality and aesthetics doesn’t have to come with a hefty price tag. In this section, we’ll explore the world of DIY backsplash projects—a cost-effective way to breathe new life into your kitchen and infuse it with character and charm. Think of it as a kitchen makeover that adds a touch of elegance without breaking the bank.
The Power of Backsplashes
A backsplash is a kitchen’s unsung hero. It’s a protective barrier that shields your walls from splatters and spills while serving as a canvas for creativity. Whether you’re a culinary enthusiast or simply appreciate the joys of a well-designed kitchen, a backsplash can elevate your cooking space to new heights.
Peel-and-Stick Allure
One of the most accessible and budget-friendly ways to revamp your kitchen is by using peel-and-stick tiles. These tiles come in a variety of colors, patterns, and finishes, allowing you to choose a style that complements your kitchen’s aesthetic. Installing them is a breeze—all you need is a clean, dry surface to begin your transformation.
Imagine the elegance of subway tiles gracing your kitchen walls, creating a timeless and sophisticated backdrop for your culinary adventures. Peel-and-stick tiles mimic the look of traditional tiles without the mess and expense of a full renovation. It’s like giving your kitchen a couture outfit without the designer price tag.
The Art of Painting
If you prefer a more budget-conscious approach, consider painting your backsplash. A coat of paint can work wonders, transforming a plain wall into a visually appealing focal point. Opt for a high-quality, washable paint in a color that complements your kitchen’s color scheme. Be sure to use painter’s tape to protect cabinets, countertops, and adjacent walls during the painting process.
With the stroke of a brush, your kitchen can take on a new personality. Whether you choose a bold, contrasting color for a contemporary look or a soft, muted shade for a cozy atmosphere, painting your backsplash is like adding an artistic masterpiece to your kitchen.
DIY Delight
The beauty of DIY backsplash projects is that they are accessible to everyone, regardless of their level of expertise. You don’t need to be a seasoned DIY enthusiast to create a stunning backsplash. All it takes is a bit of patience, attention to detail, and the right tools.
For peel-and-stick tiles, ensure you measure and cut accurately, following the manufacturer’s instructions. Painting requires preparation, including cleaning, priming, and using the appropriate tools for a smooth finish. It’s a bit like preparing a canvas—attention to detail is key.
Declutter and Reorganize: Free Home Makeover
Home improvement doesn’t always require hefty investments or major renovations. Sometimes, the most transformative changes can be achieved by simply decluttering and reorganizing your living spaces. This section will guide you through the process of giving your home a fresh, free makeover—creating a more functional, harmonious, and inviting environment without spending a cent. Think of it as a makeover that breathes new life into your living spaces, bringing out their hidden potential.
The Power of Decluttering
Clutter can weigh down not only your physical space but also your mental well-being. It accumulates over time, filling corners, shelves, and closets with items you no longer need or use. The first step in your free home makeover journey is to declutter with purpose.
- Begin by going through each room systematically. Identify items you haven’t used in months or those that no longer serve a purpose.
- Ask yourself if an item brings you joy or has practical value. If not, it may be time to part with it.
- Organize a donation pile for items that are still in good condition and can benefit someone else.
- Recycle or responsibly dispose of items that are no longer usable.
Decluttering is like removing a heavy coat that you’ve worn for too long. It instantly lightens the atmosphere, creating a sense of spaciousness and clarity. Your living spaces will breathe easier, and so will you.
Reorganize for Functionality
Once you’ve decluttered, it’s time to reorganize your home for optimal functionality. This process involves rearranging furniture, creating efficient storage solutions, and establishing a more cohesive layout. The goal is to make the most of your available space and ensure that every item has a designated place.
- Rearrange Furniture: Experiment with different furniture layouts to maximize space and flow. Move items around until you find the arrangement that works best for your daily activities.
- Storage Solutions: Make use of storage baskets, bins, and shelves to keep items organized and easily accessible. Invest in drawer dividers and closet organizers to maintain order.
- Functional Zones: Designate specific areas for different activities, such as a reading nook, a workspace, or an entertainment center. This will help create a more organized and purposeful living environment.
Reorganizing your home is akin to solving a puzzle. Each piece fits together to create a harmonious whole. It enhances the functionality of your space, making it more conducive to your daily routines.
The Art of the Free Makeover
A free home makeover is not about buying new furniture or embarking on costly renovations. It’s about recognizing the untapped potential within your existing space. By decluttering and reorganizing, you reveal the true beauty and functionality of your home.
This process is like peeling away layers to reveal a hidden masterpiece. Your home has always possessed the potential for greatness; it just needed a little attention and care to shine through. In the end, you’ll discover that the most valuable elements of your living spaces aren’t measured in dollars but in the comfort and functionality they bring to your life.
Upcycled Decor: Creative DIY Allure
In the world of home decor, creativity knows no bounds, especially when it comes to upcycled decor projects. Upcycling is the art of giving new life to old or discarded items, and it’s a fantastic way to infuse your home with unique character and style. In this section, we’ll delve into the world of creative DIY upcycled decor, where you’ll discover how to turn everyday items into works of art. Think of it as a journey into the world of repurposing, where budget-friendly beauty meets sustainability.
The Allure of Upcycling
Upcycled decor isn’t just about saving money; it’s about adding a personal touch to your living spaces while being environmentally responsible. The possibilities are endless, limited only by your imagination. Here are a few ideas to spark your creativity:
- Crate Shelves: Old wooden crates can be transformed into rustic and charming shelves. Simply clean them up, paint or stain them in your preferred color, and mount them on your walls. These unique shelves are perfect for displaying books, plants, or decorative items. It’s like turning forgotten crates into functional works of art.
- Wine Bottle Vases: Empty wine bottles are more than just recyclables; they’re the canvas for your creativity. Remove the labels, clean the bottles thoroughly, and use them as vases for fresh or dried flowers. You can even paint them to match your decor. It’s like uncorking a world of floral possibilities.
- Vintage Frame Mirrors: Old frames often find themselves discarded, but they hold the potential to become stylish mirrors. Find a frame that speaks to you, clean it up, and have a mirror cut to fit its dimensions. Paint or refinish the frame to match your decor, and you’ve created a unique and visually striking mirror. It’s like gazing into the past while embracing the present.
The DIY Allure
One of the most appealing aspects of upcycled decor is the DIY element. These projects invite you to roll up your sleeves and get crafty, transforming forgotten items into cherished pieces of decor. The sense of accomplishment that comes from creating something with your own hands is immensely satisfying.
It’s like turning your home into an art studio, where discarded items become your canvas, and your creativity flows freely. You’ll find that upcycled decor projects not only save you money but also offer a creative outlet that brings joy and a sense of achievement.
Sustainability Meets Style
Beyond the financial and creative benefits, upcycled decor aligns with a sustainable and eco-conscious lifestyle. By repurposing items that might otherwise end up in landfills, you’re reducing waste and environmental impact. It’s like being a guardian of both your home’s style and the planet’s well-being.
Final Remarks On Budget-Friendly Home Upgrades
Upgrading your home on a budget doesn’t mean sacrificing style or quality. With a little creativity, resourcefulness, and a willingness to roll up your sleeves, you can transform your living space without breaking the bank. Whether it’s a fresh coat of paint, secondhand treasures, or DIY projects, these budget-friendly home improvement ideas are your ticket to a more beautiful and wallet-friendly home.
FAQs
Q1. Can I really achieve a significant transformation on a tight budget?
Absolutely! Small changes, such as painting or upcycling decor, can have a big impact. It’s all about being resourceful and creative.
Q2. What are some other DIY projects I can tackle to upgrade my home on a budget?
Consider refinishing furniture, creating custom wall art, or adding crown molding for an elegant touch.
Q3. How can I make the most of secondhand furniture and decor finds?
Look for items with good bones that can be easily refurbished or customized to match your style.
Q4. Are LED bulbs really worth the investment?
Yes, LED bulbs are energy-efficient and have a longer lifespan than traditional bulbs, which can lead to significant savings on your energy bills.
Q5. How can I ensure my DIY projects turn out well?
Start with small projects, gather the necessary tools and materials, and follow online tutorials or seek guidance from experienced DIYers. Practice makes perfect!
My experience with LEDs are that they do not last long as advertised, therefore the benefits are less or nonexistent.